- Cut one card base 5 1/2" X 6", score at 2 3/4" (on the 6" side). Both my cardstock and the following three pieces where cut from Basic White cardstock.
- Cut 3 more pieces of the same cardstock:
- 1 - 5 1/4" X 1 3/4", score at 2 5/8" and 3/8" from each end
- 1 - 4 1/2" X 2 1/2", score at 2 1/4" and 3/8" from each end
- 1 - 3 1/2" X 1 1/4", score at 1 3/4" and 3/8" from each end
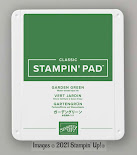
- Cut 7 pieces of coordinating cardstock. I used Garden Green cardstock here.
- 3 - 5 1/4" X 2 3/4"
- 2 - 1 3/4" X 2 1/4"
- 2 - 2" X 1 5/8"
- Cut 7 pieces of DSP (Designer Series Paper); each different size of DSP can be in coordinating but different designs. I used retired Forever Fern DSP.
- 3 - 5" X 2 1/2"
- 2 - 1 7/8" X 1 3/8"
- 2 - 2" X 1 1/2"
INSTRUCTIONS
1. Fold and burnish each score line on the card base and the three additional pieces of cardstock.
2. Place appropriately sized strips of StampinUp Tear 'n Tape on each of the 3/8" sections on the three smaller pieces of cardstock
3. Adhere the three large pieces of DSP to the three large pieces of coordinating cardstock. Adhere one of these pieces to the front of the card base and the other two to the inside (folded open) card base
4. Adhere the four pieces of DSP to the four remaining pieces of coordinating cardstock. Adhere these pieces to the front of the two larger pieces of cardstock.
5. Starting with the smaller of the three pieces of cardstock:
- Fold down the 3/8" strip on each end of the first piece, remove the cover on the Tear 'n Tape. Line up the center score line of this piece with the center score line and the bottom of the card base.
- On the second piece (the larger of the two remaining), fold down the 3/8" strip on each end. Remove the cover on the Tear 'n Tape. Line up the center score line with the center score line of the card base (and the above piece) and the bottom of the card base.
- On the third piece (the longest of the three pieces), fold down the 3/8" strip on each end. Remove the cover on the Tear 'n Tape. Line up the center score line with the center score line of the card base (and the two pieces already adhered to the front of the card) and the bottom of the card base.
6. Now you can begin to place punched out or die cut flowers etc. to the balconies formed on the card base. I used the Harvest Dies from the July-December 2021 Mini Catalogue (p. 71), the Quiet Meadows Dies and Blender brushes and a variety of coordinating inks to colour the die cut pieces.
7. Add your sentiment where appropriate.
Don't forget to check out all the other amazing projects in our blog hop!!










No comments:
Post a Comment